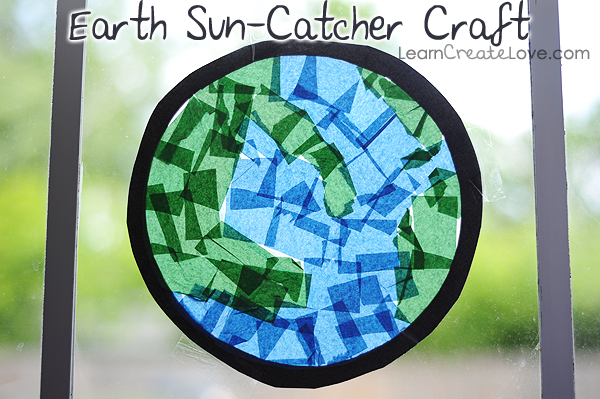
Last week, we did this cute flower sun-catcher with contact paper. Lore really enjoyed doing the craft with contact paper; it’s sticky and way less messy than wax paper and glue. It made doing the craft a breeze! I think the hardest part was getting the backing off of the contact paper… talk about frustrating! LOL! Don’t be intimidated by the instructions below… it’s actually really simple and straight-forward!
What You’ll Need:
Contact Paper – two equal pieces clipped
Black Construction Paper
Pen
Scissors
Tissue Paper – blue and green
What You Do:
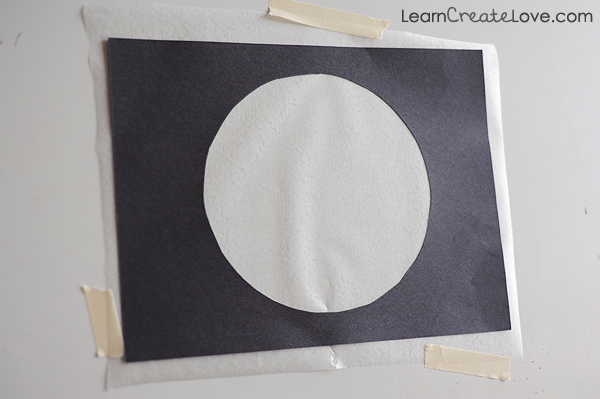
First, you’ll need to cut the holes out of the black construction paper. I recommend getting something round to trace (I used a lid). Stack the two pieces of paper, put the lid (or whatever) on top and trace it. Be sure to press HARD so the impression will go to bottom piece of paper as well.
Cut out the inside of the circles and discard the clippings.
Now, hang your first sheet of contact paper up. If you have a large window or sliding glass door, that would be best. We don’t, so I hung ours up on Lorelai’s easel. It’s not as great, but it still works! Make sure you hang it sticky-side out!!
Place one of the black construction papers (with the hole cut out) onto the contact paper.
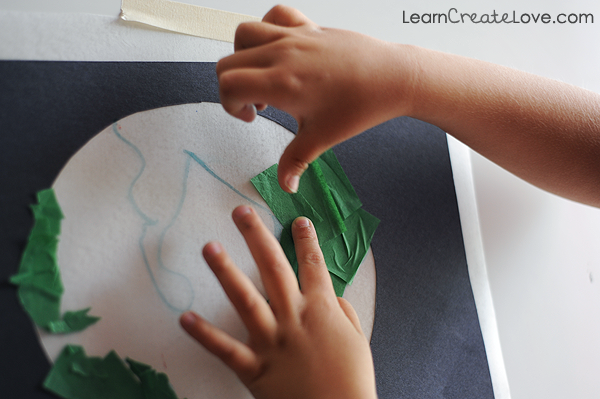
Cut your tissue paper into squares. Do this by folding it over a few times and cutting!
Have your child decorate the inside of the circle (the Earth) with blue and green construction paper. I had Lorelai draw blobs onto ours with a marker. She then filled them in with green (earth) and then filled in the empty spots with blue (water).
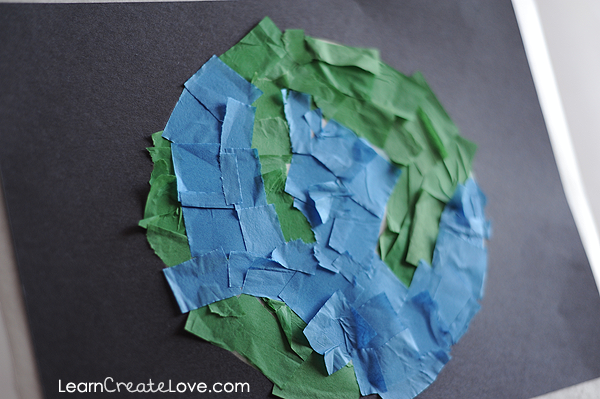
When finished, peel off the other contact paper lining and press the other construction paper to it. Then gently lift it to the contact/tissue paper earth and press it. Be sure to line the two circles up perfectly so there will be no overlap.
Rub out any wrinkles.
At this point, you will want to trim off the excess. I did about an inch border on our earth, but more would be good too! You could decorate the black part with star stickers.
NOTE: This is just one way to do this. We’ve done sun-catcher crafts with contact paper and construction paper that are similar to the wax paper/glue. You cut the holes out of the construction paper, then stick the contact paper INSIDE so that it just a contact paper window. Add your tissue paper, then stick the sheets together. The construction paper will be on the outside. That way is good too, but the way I described in this craft is fine for this craft; I just wanted the construction paper to be a border, so it didn’t really need to be on the outside.
I hope you get a chance to do this craft with your child. It’s a great way to celebrate Earth Day and get creative!
I want to do this project with my 2/3 preschool class. With assistance of course. Could I just as easily use wax paper without ironing it? would the sun still shine through enough. I love your crafts, I have been printing alot of them I work in a Jewish school, so if you ever come across a Jewish craft project I would be thrilled to see it here! Keep on crafting!
{"id":null,"mode":"form","open_style":"in_place","currency_code":"USD","currency_symbol":"$","currency_type":"decimal","blank_flag_url":"https:\/\/learncreatelove.com\/wp-content\/plugins\/tip-jar-wp\/\/assets\/images\/flags\/blank.gif","flag_sprite_url":"https:\/\/learncreatelove.com\/wp-content\/plugins\/tip-jar-wp\/\/assets\/images\/flags\/flags.png","default_amount":500,"top_media_type":"none","featured_image_url":false,"featured_embed":"","header_media":null,"file_download_attachment_data":null,"recurring_options_enabled":true,"recurring_options":{"never":{"selected":true,"after_output":"One time only"},"weekly":{"selected":false,"after_output":"Every week"},"monthly":{"selected":false,"after_output":"Every month"},"yearly":{"selected":false,"after_output":"Every year"}},"strings":{"current_user_email":"","current_user_name":"","link_text":"Leave a tip","complete_payment_button_error_text":"Check info and try again","payment_verb":"Pay","payment_request_label":"","form_has_an_error":"Please check and fix the errors above","general_server_error":"Something isn't working right at the moment. Please try again.","form_title":"","form_subtitle":null,"currency_search_text":"Country or Currency here","other_payment_option":"Other payment option","manage_payments_button_text":"Manage your payments","thank_you_message":"Thank you for being a supporter!","payment_confirmation_title":"","receipt_title":"Your Receipt","print_receipt":"Print Receipt","email_receipt":"Email Receipt","email_receipt_sending":"Sending receipt...","email_receipt_success":"Email receipt successfully sent","email_receipt_failed":"Email receipt failed to send. Please try again.","receipt_payee":"Paid to","receipt_statement_descriptor":"This will show up on your statement as","receipt_date":"Date","receipt_transaction_id":"Transaction ID","receipt_transaction_amount":"Amount","refund_payer":"Refund from","login":"Log in to manage your payments","manage_payments":"Manage Payments","transactions_title":"Your Transactions","transaction_title":"Transaction Receipt","transaction_period":"Plan Period","arrangements_title":"Your Plans","arrangement_title":"Manage Plan","arrangement_details":"Plan Details","arrangement_id_title":"Plan ID","arrangement_payment_method_title":"Payment Method","arrangement_amount_title":"Plan Amount","arrangement_renewal_title":"Next renewal date","arrangement_action_cancel":"Cancel Plan","arrangement_action_cant_cancel":"Cancelling is currently not available.","arrangement_action_cancel_double":"Are you sure you'd like to cancel?","arrangement_cancelling":"Cancelling Plan...","arrangement_cancelled":"Plan Cancelled","arrangement_failed_to_cancel":"Failed to cancel plan","back_to_plans":"\u2190 Back to Plans","update_payment_method_verb":"Update","sca_auth_description":"Your have a pending renewal payment which requires authorization.","sca_auth_verb":"Authorize renewal payment","sca_authing_verb":"Authorizing payment","sca_authed_verb":"Payment successfully authorized!","sca_auth_failed":"Unable to authorize! Please try again.","login_button_text":"Log in","login_form_has_an_error":"Please check and fix the errors above","uppercase_search":"Search","lowercase_search":"search","uppercase_page":"Page","lowercase_page":"page","uppercase_items":"Items","lowercase_items":"items","uppercase_per":"Per","lowercase_per":"per","uppercase_of":"Of","lowercase_of":"of","back":"Back to plans","zip_code_placeholder":"Zip\/Postal Code","download_file_button_text":"Download File","input_field_instructions":{"tip_amount":{"placeholder_text":"How much would you like to tip?","initial":{"instruction_type":"normal","instruction_message":"How much would you like to tip? Choose any currency."},"empty":{"instruction_type":"error","instruction_message":"How much would you like to tip? Choose any currency."},"invalid_curency":{"instruction_type":"error","instruction_message":"Please choose a valid currency."}},"recurring":{"placeholder_text":"Recurring","initial":{"instruction_type":"normal","instruction_message":"How often would you like to give this?"},"success":{"instruction_type":"success","instruction_message":"How often would you like to give this?"},"empty":{"instruction_type":"error","instruction_message":"How often would you like to give this?"}},"name":{"placeholder_text":"Name on Credit Card","initial":{"instruction_type":"normal","instruction_message":"Enter the name on your card."},"success":{"instruction_type":"success","instruction_message":"Enter the name on your card."},"empty":{"instruction_type":"error","instruction_message":"Please enter the name on your card."}},"privacy_policy":{"terms_title":"Terms and conditions","terms_body":null,"terms_show_text":"View Terms","terms_hide_text":"Hide Terms","initial":{"instruction_type":"normal","instruction_message":"I agree to the terms."},"unchecked":{"instruction_type":"error","instruction_message":"Please agree to the terms."},"checked":{"instruction_type":"success","instruction_message":"I agree to the terms."}},"email":{"placeholder_text":"Your email address","initial":{"instruction_type":"normal","instruction_message":"Enter your email address"},"success":{"instruction_type":"success","instruction_message":"Enter your email address"},"blank":{"instruction_type":"error","instruction_message":"Enter your email address"},"not_an_email_address":{"instruction_type":"error","instruction_message":"Make sure you have entered a valid email address"}},"note_with_tip":{"placeholder_text":"Your note here...","initial":{"instruction_type":"normal","instruction_message":"Attach a note to your tip (optional)"},"empty":{"instruction_type":"normal","instruction_message":"Attach a note to your tip (optional)"},"not_empty_initial":{"instruction_type":"normal","instruction_message":"Attach a note to your tip (optional)"},"saving":{"instruction_type":"normal","instruction_message":"Saving note..."},"success":{"instruction_type":"success","instruction_message":"Note successfully saved!"},"error":{"instruction_type":"error","instruction_message":"Unable to save note note at this time. Please try again."}},"email_for_login_code":{"placeholder_text":"Your email address","initial":{"instruction_type":"normal","instruction_message":"Enter your email to log in."},"success":{"instruction_type":"success","instruction_message":"Enter your email to log in."},"blank":{"instruction_type":"error","instruction_message":"Enter your email to log in."},"empty":{"instruction_type":"error","instruction_message":"Enter your email to log in."}},"login_code":{"initial":{"instruction_type":"normal","instruction_message":"Check your email and enter the login code."},"success":{"instruction_type":"success","instruction_message":"Check your email and enter the login code."},"blank":{"instruction_type":"error","instruction_message":"Check your email and enter the login code."},"empty":{"instruction_type":"error","instruction_message":"Check your email and enter the login code."}},"stripe_all_in_one":{"initial":{"instruction_type":"normal","instruction_message":"Enter your credit card details here."},"empty":{"instruction_type":"error","instruction_message":"Enter your credit card details here."},"success":{"instruction_type":"normal","instruction_message":"Enter your credit card details here."},"invalid_number":{"instruction_type":"error","instruction_message":"The card number is not a valid credit card number."},"invalid_expiry_month":{"instruction_type":"error","instruction_message":"The card's expiration month is invalid."},"invalid_expiry_year":{"instruction_type":"error","instruction_message":"The card's expiration year is invalid."},"invalid_cvc":{"instruction_type":"error","instruction_message":"The card's security code is invalid."},"incorrect_number":{"instruction_type":"error","instruction_message":"The card number is incorrect."},"incomplete_number":{"instruction_type":"error","instruction_message":"The card number is incomplete."},"incomplete_cvc":{"instruction_type":"error","instruction_message":"The card's security code is incomplete."},"incomplete_expiry":{"instruction_type":"error","instruction_message":"The card's expiration date is incomplete."},"incomplete_zip":{"instruction_type":"error","instruction_message":"The card's zip code is incomplete."},"expired_card":{"instruction_type":"error","instruction_message":"The card has expired."},"incorrect_cvc":{"instruction_type":"error","instruction_message":"The card's security code is incorrect."},"incorrect_zip":{"instruction_type":"error","instruction_message":"The card's zip code failed validation."},"invalid_expiry_year_past":{"instruction_type":"error","instruction_message":"The card's expiration year is in the past"},"card_declined":{"instruction_type":"error","instruction_message":"The card was declined."},"missing":{"instruction_type":"error","instruction_message":"There is no card on a customer that is being charged."},"processing_error":{"instruction_type":"error","instruction_message":"An error occurred while processing the card."},"invalid_request_error":{"instruction_type":"error","instruction_message":"Unable to process this payment, please try again or use alternative method."},"invalid_sofort_country":{"instruction_type":"error","instruction_message":"The billing country is not accepted by SOFORT. Please try another country."}}}},"fetched_oembed_html":false}

I love this craft! Just did it with my son and it came out beautifully.
I want to do this project with my 2/3 preschool class. With assistance of course. Could I just as easily use wax paper without ironing it? would the sun still shine through enough. I love your crafts, I have been printing alot of them I work in a Jewish school, so if you ever come across a Jewish craft project I would be thrilled to see it here! Keep on crafting!